If you’re configuring a web application on AWS, whether it’s a serverless, Kubernetes or EC2 based solution, it’s quite common to have CloudFront as CDN, AWS WAF as Web Application Firewall and AWS Elastic Load Balancer in front of your web service.

Purpose of each components can be listed as;
AWS Web Application Firewall:
- IP based restriction to protect some pages from public access.
- URL based restriction to protect some URIs from public access.
- Protect applications against common web exploits.
CloudFront
- Caching static contents
- Catching error pages and showing custom error pages
- Serving static content directly from S3 bucket
S3
- Keeping custom error pages
- Keeping all other static contents
As on this post we won’t look at origin/resource of CloudFront, we can start configuration with CloudFront.
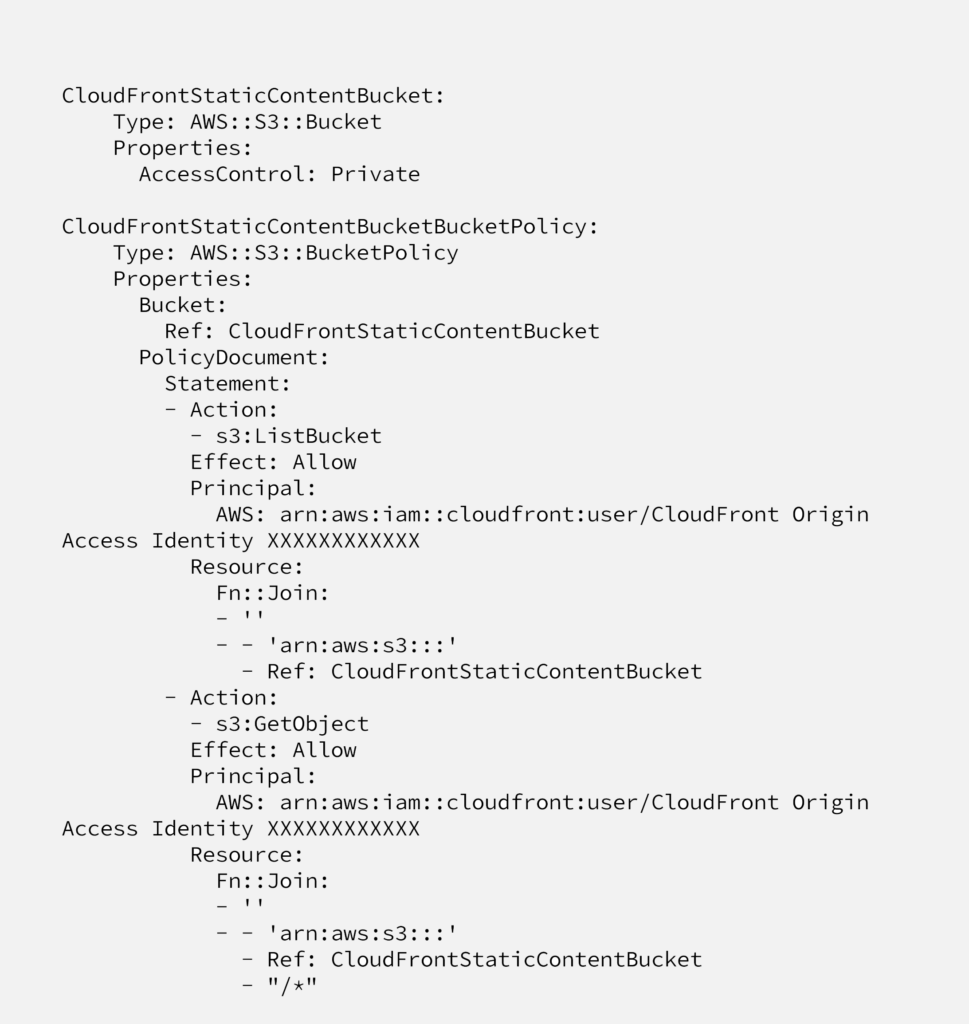
Creating S3 Bucket
Although it’s not something to learn on this port, as we’ll give reference to this post, it’s nice to put S3 code here as well;
Configuring CloudFront
CloudFront can be configured to use different type of origins as S3 or any other type of Web Services, including Elastic Load Balancer. Together with our original origin, we also would like to create an origin for S3 bucket which is keeping our static pages and custom error pages. With CloudFormation code;
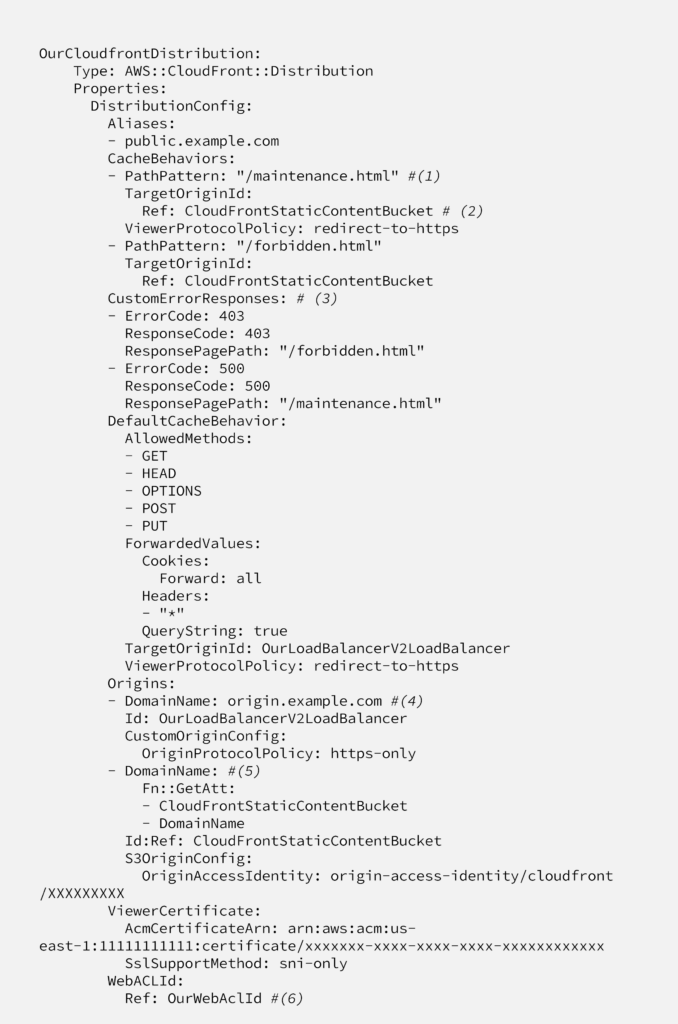
On this code;
line (1) we catch some URIs to use a different origin than default origin.
line (2) defines which origin will be used for this path
line (3) configures Custom Error pages, it catches error code and show custom error pages hosted at S3.
line (4) defines default origin, in this example it’s just an AWS or external web page.
line (5) defines a second origin, it’s S3 bucket. We’re using this bucket at line (2) to show custom error pages.
line (6) tells CloudFront distribution to execute WAF rules for each requests hitting to CloudFront.
Configuring Web Application Firewall
So far we’ve configured a classical CloudFront + S3 + Web Endpoint architecture.
With the codes below, we’ll configure WAF. WAF consist of 3 main components, they are;
- Conditions: Defines in which condition WAF will return `True` or `False` code, or count the number of requests.
- Rules: Based on conditions defined above, which action will be taken.
- Web ACL: Main WAF resource
On this post we’ll only create source IP whitelisting solution for sake of simplicity. To be able to do so, we also need another resource called AWS::WAF::IPSet
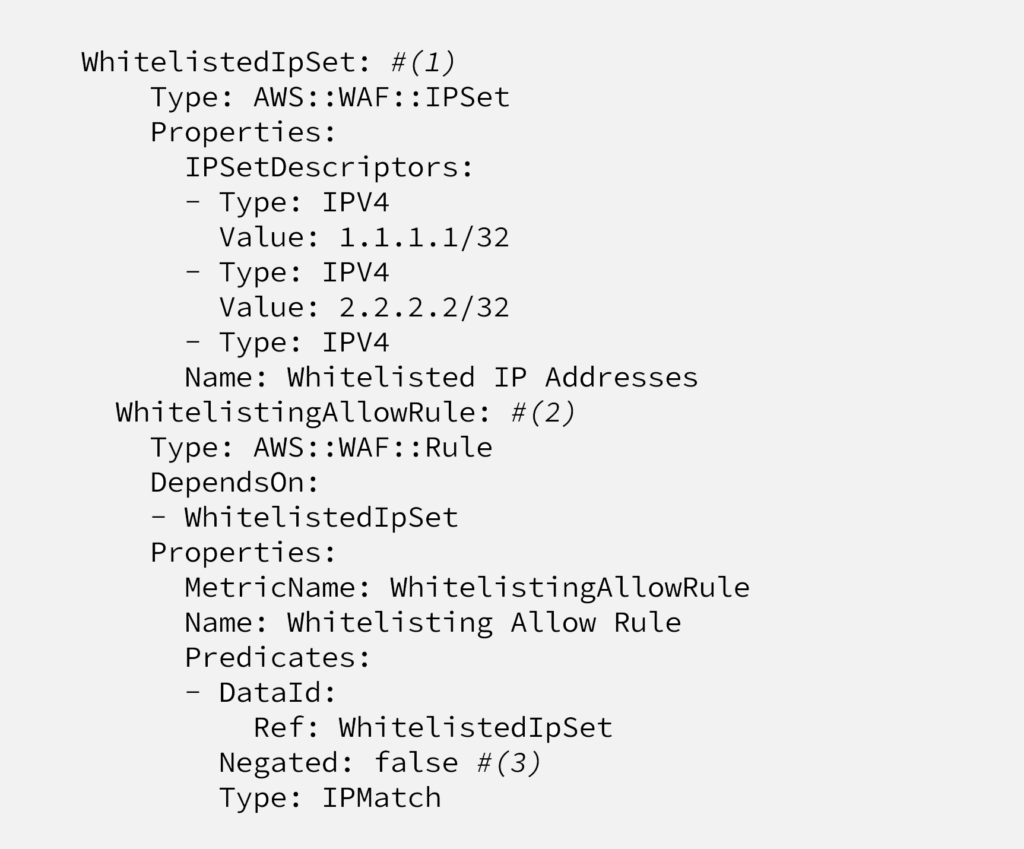
On this code;
line (1) creates the IP set, line (2) creates a positive rule. Line (3) says that if the requests comes from one of the defines IP addresses, return true.
And finally below, we’ll create Web ACL.
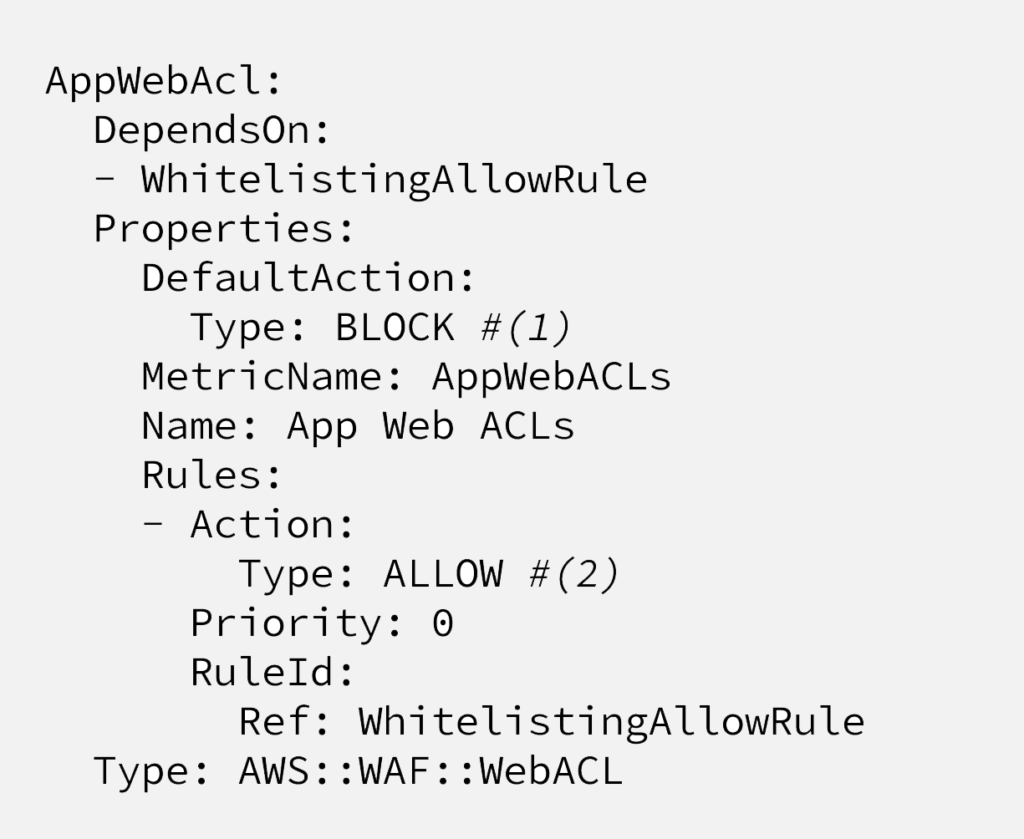
Here on this code, line (1) defines the default action, meaning if request doesn’t match any of the rules, WAF will take this action, in this case it’s “BLOCK”. Options are “ALLOW”, “BLOCK” and “COUNT”.
And line (2) defines the action will be taken, if the request matches the “WhitelistingAllowRule” rule. In this example, it is whitelisted IP addressed. So if the requests come from one of the defined IP addressed, it’ll trigger ALLOW action.
Well, congratulations if you make it until here.
Next steps can be defining URL based match rules or creating smart rules with COUNT action.
Feel free to reach us out !